When I was planning my under-sink cabinet layout for the Narwal Flow 2 plumbed (compact) version, my biggest headache wasn’t the height or water hookups—it was calculating the total depth clearance. If you’ve looked closely at standard robot vacuum docks, you know the issue: on many water-tank models, the robot sits awkwardly half-out of the base station, adding several inches of unexpected overhang that ruins clean cabinet lines or prevents cabinet doors from shutting.
I spent a lot of time double-checking official schematics, measuring my laundry room and kitchen nooks, and tracking every Narwal robot vacuum and mop on sale deal before finally pulling the trigger. Here is what I actually found from hands-on fitting, real-life placement, and testing!
The Short Answer: No, It Sits Completely Flush
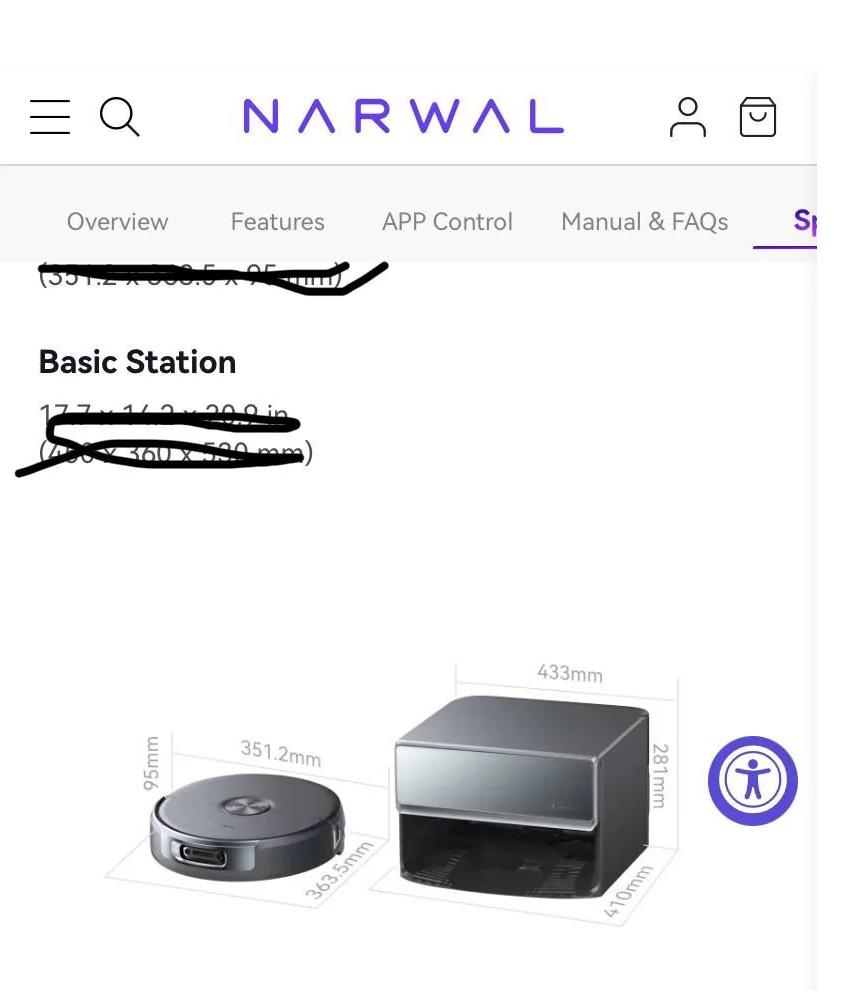
Unlike standard tank-based models where the robot’s nose pokes forward past the base edge, the Narwal Flow 2 plumbed (compact) base station fully encloses the robot’s depth footprint when docked. You can rely directly on Narwal’s official dock depth specs—there is zero front overhang, allowing for seamless under-cabinet or under-sink installation.
My Research & Experience: Why The Confusion Happens
When I first started researching cabinet cutouts, I kept getting conflicting visual information online. Many photos floating around social media show the standard, non-plumbed base station, which can be super confusing when you’re trying to design a clean, minimal aesthetic for your home.
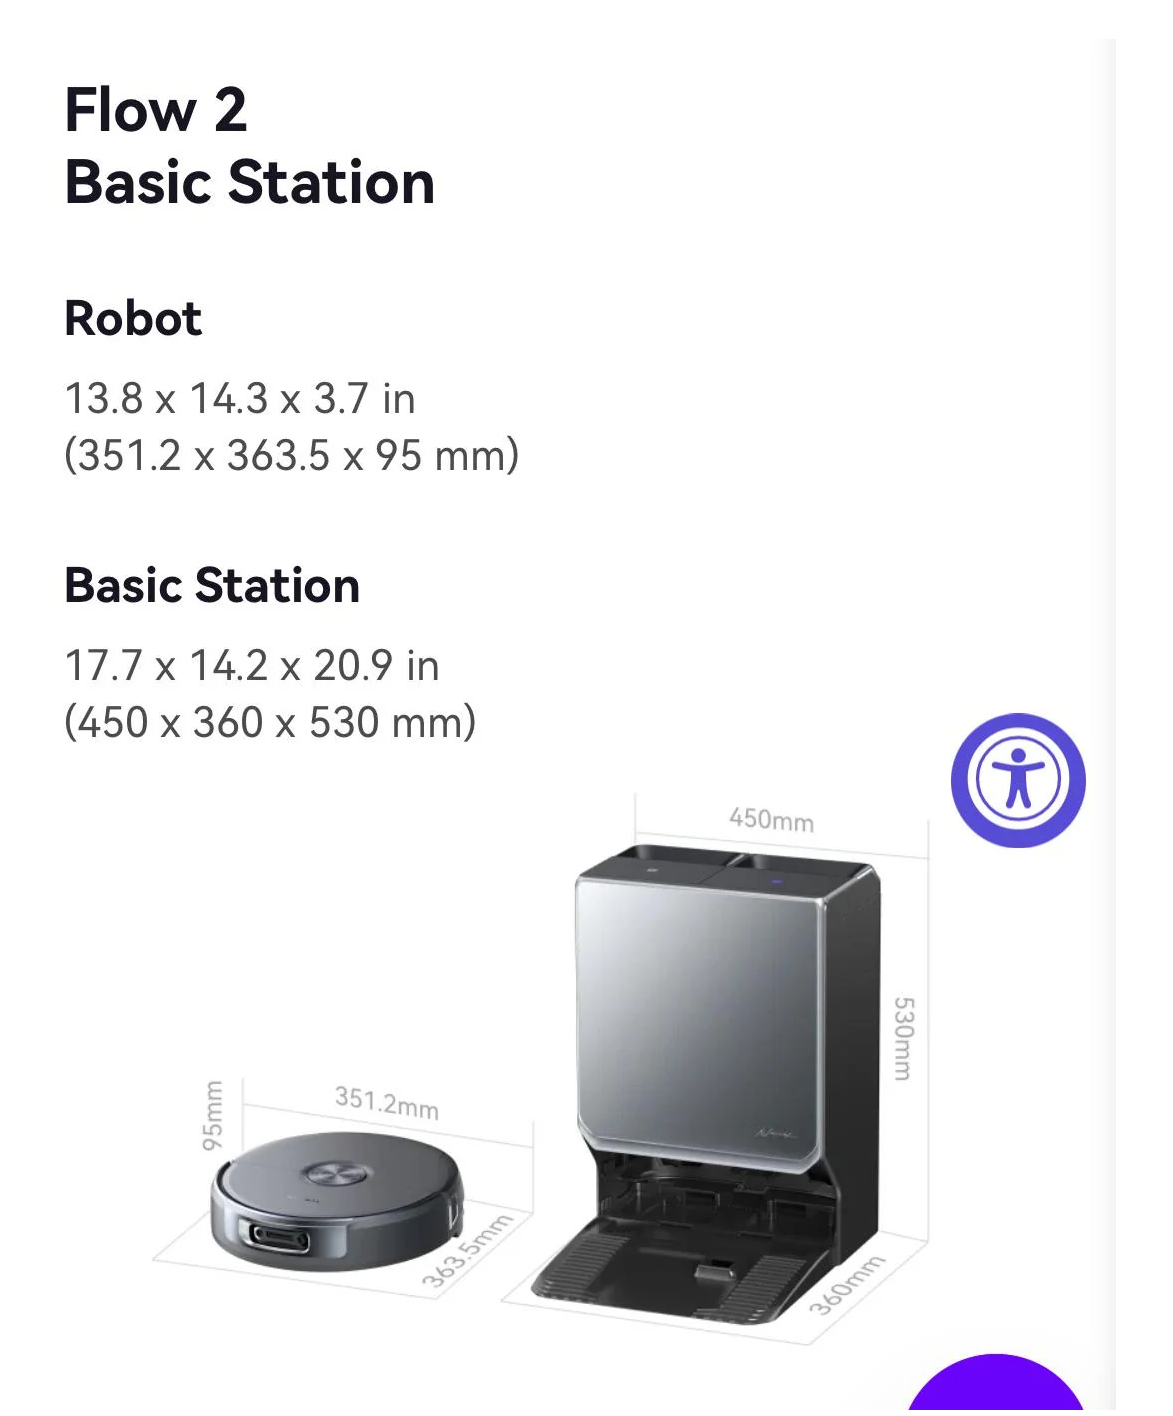
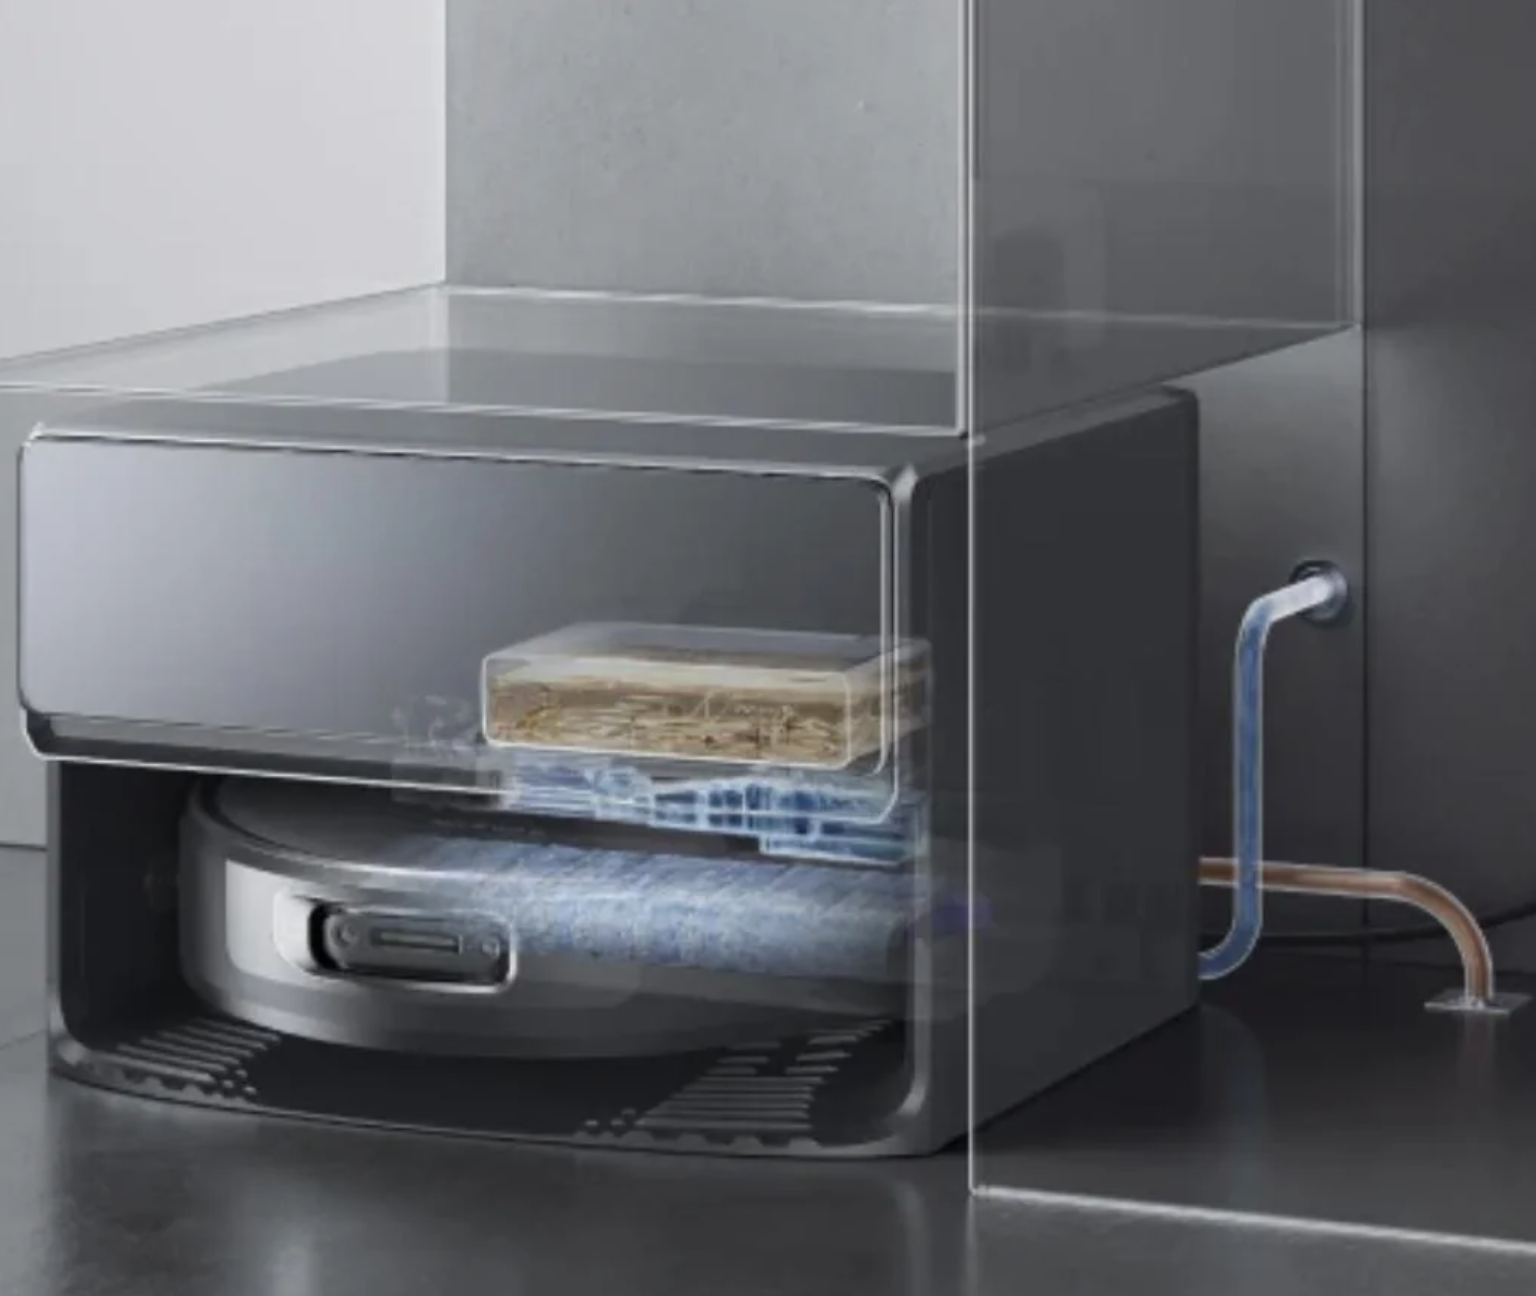
Because the plumbed version eliminates the bulky top-loading water tanks, Narwal completely redesigned the internal geometry of the dock. The robot drives further back into the base, keeping the front profile square, flush, and flat.
Standard Tank Model vs. Plumbed (Compact) Model
| Feature | Standard Tank Model | Plumbed (Compact) Model |
|---|---|---|
| Water Supply | Internal clean/dirty tanks | Direct water line hookup |
| Base Station Footprint | Taller, slightly shallower housing | Compact, deeper enclosed housing |
| Docked Robot Position | Robot nose/body extends forward | Robot sits entirely inside the dock footprint |
| Under-Cabinet Fit | Requires extra depth buffer for overhang | Matches base station depth dimensions strictly |
What I Like About This Setup
- Sleek Architectural Integration: It completely hides the clutter of cleaning gear under my sink cabinets.
- Zero Front Overhang: The front profile stays totally flush with my cabinet edges.
- True Hands-Free Operation: Hooking up to plumbing means no more carrying heavy water tanks back and forth.
What I Don’t Like
- Requires Dedicated Plumbing Access: You must plan water inlet and drainage line placement carefully beforehand.
- Precise Clearance Needed Behind Dock: You can’t push it 100% flush against the back wall due to hose connections.
Biggest Surprises & Installation Tips
While the robot doesn’t stick out beyond the dock itself, installing a plumbed unit inside a cabinet or under a sink still requires a couple of real-world adjustments I learned the hard way during my installation:
- Account for the Navigation Runway: Even though the robot sits flush inside the dock while charging, it still needs about 1.5 to 2 feet of clear, unimpeded floor space directly in front of the dock to exit, rotate, and calibrate its sensors. Don’t place a cabinet door edge or trim piece so close that it interferes with its laser housing as it backs out.
- Plumbing & Hose Clearance Behind the Dock: The plumbed base sits flush against the floor, but remember that the water inlet and drain hoses attach at the back. Leave roughly 0.5 to 1 inch of clearance behind the dock so you don’t crimp the water supply or drainage lines against the back wall of your cabinet.
- Check Door Hinges and Lip Heights: If you plan to hide the dock behind cabinet doors, make sure the bottom door rail clears the top of the dock, or use custom cabinet doors that stop just above the dock opening.
Who Should Buy (and Who Should Skip)
Who Should Buy:
- Homeowners or renters doing kitchen/laundry renovations who want a seamless, built-in look.
- Anyone who hates manually refilling clean water tanks and emptying dirty water.
- Design lovers looking to save floor space and keep high-tech appliances hidden.
Who Should Skip:
- Anyone living in a rental where plumbing line modifications are strictly forbidden.
- Homes without access to a water supply line or drain nearby (in that case, stick to the standard tank model!).
Buying Guide & Price Savings
The Narwal Flow 2 plumbed version is a premium investment, but you don’t have to pay full price for it. Major sales events like Black Friday, Prime Day, and Narwal’s brand anniversary bring significant price drops.
If you’re looking for an active discount code or want to compare current promo prices across major retailers, make sure to bookmark my curated robot vacuum mop sales calendar to catch the next price drop before it sells out.
Frequently Asked Questions
Does the Narwal Flow 2 plumbed version require a garbage disposal connection?
No, but it does need a standard drain pipe access (similar to a dishwasher or washing machine drain line) to discharge waste water safely.
Can I install the compact Narwal Flow 2 base inside an enclosed cabinet with doors?
Yes, provided you leave enough clearance for the robot to exit freely and ensure the cabinet doors stay open while the robot is actively cleaning or returning to dock.
Is the compact plumbed dock the exact same depth as the standard tank dock?
No, the plumbed dock has a compact footprint specifically engineered to hold the robot entirely within its shell, eliminating the front overhang found on standard models.
Final Thoughts
If you are tight on depth and looking for a seamless, built-in look under a sink or counter, the plumbed Flow 2 compact version is significantly easier to integrate than the standard tank model. You can take the dock’s official depth measurement as your absolute baseline without adding extra safety margins for a protruding robot nose. Happy cleaning and happy home designing!
